
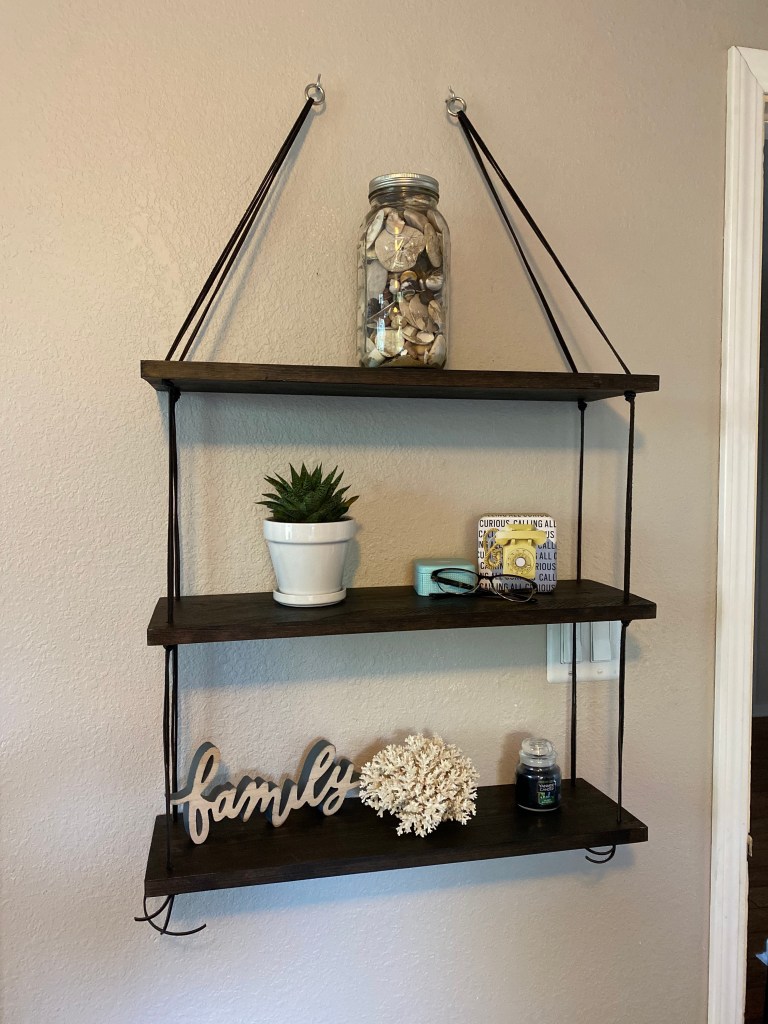
My younger sister called me up asking for some new shelves for her room. I had seen some options on Pinterest and figured I could make something similar for her!
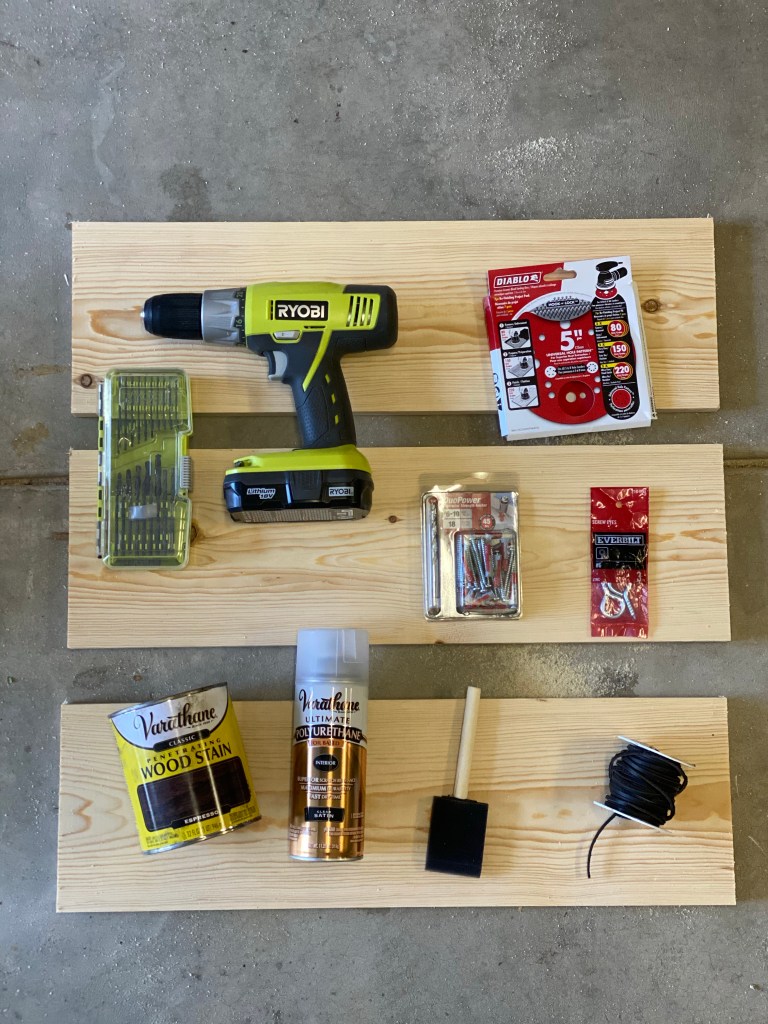
I started by picking up some supplies from Home Depot! A 1”x 8”x 10’ Common Board, I picked the one with the best looking grain pattern as I’m going to stain it later. I also got some 1” metal rings, ceiling hooks, and drywall anchors as hardware for hanging.
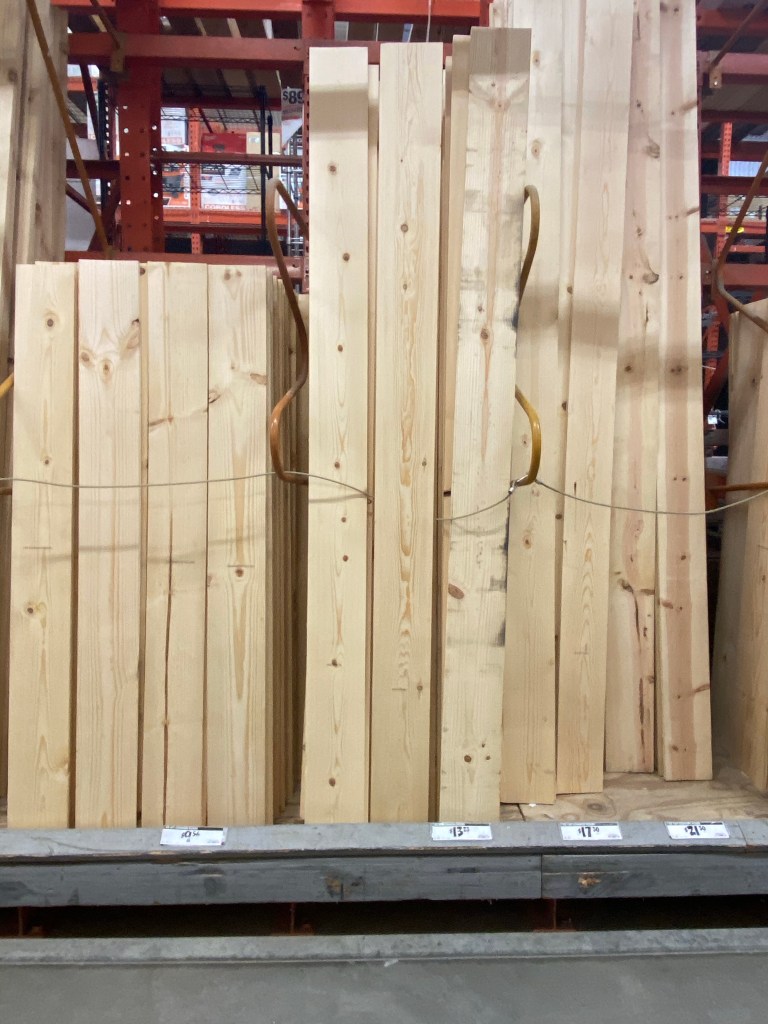
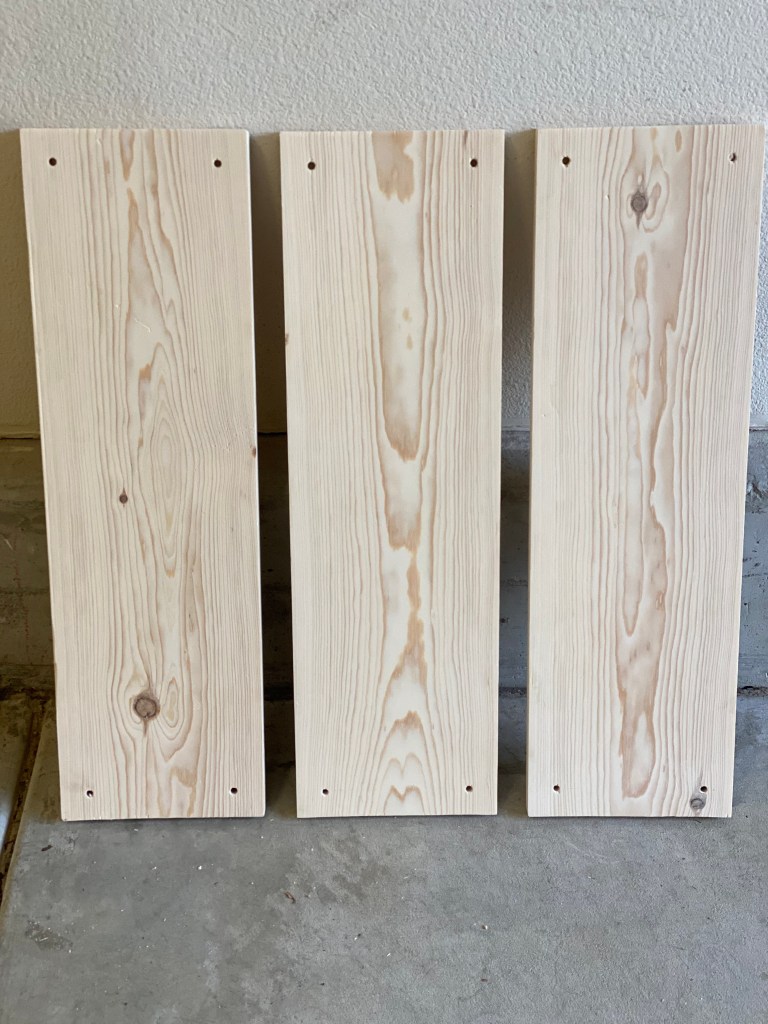
Most home improvement stores like Home Depot and Lowe’s can cut the board down into the lengths you like. I just measured out 24” sections and used my circular saw to cut them!
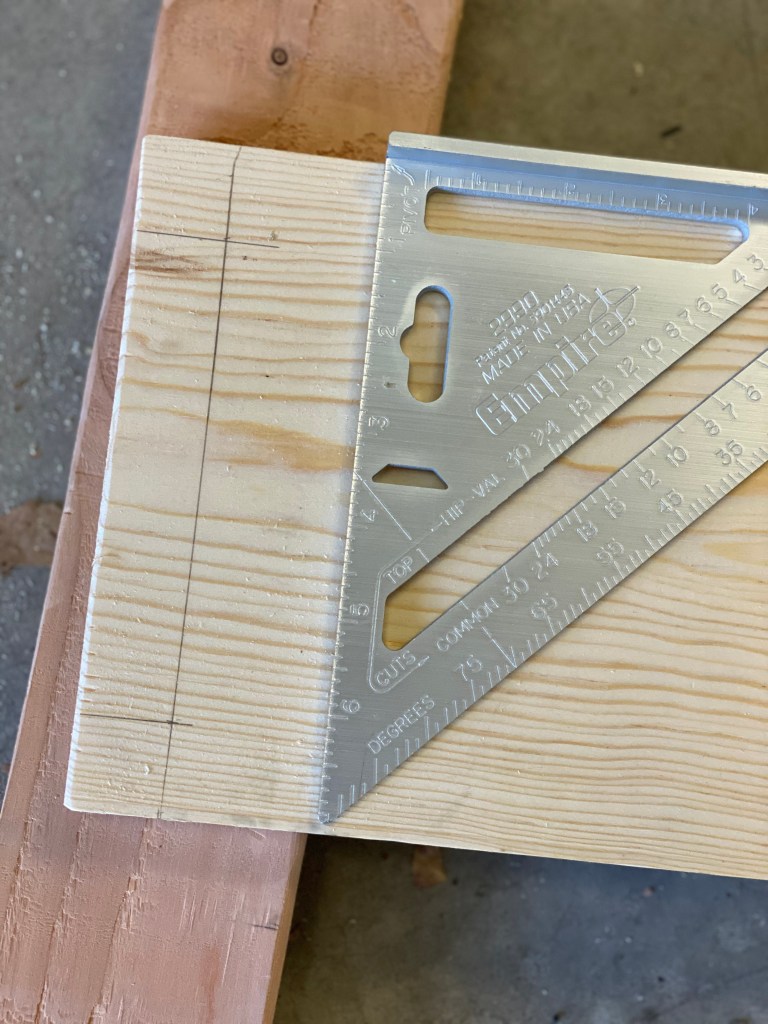
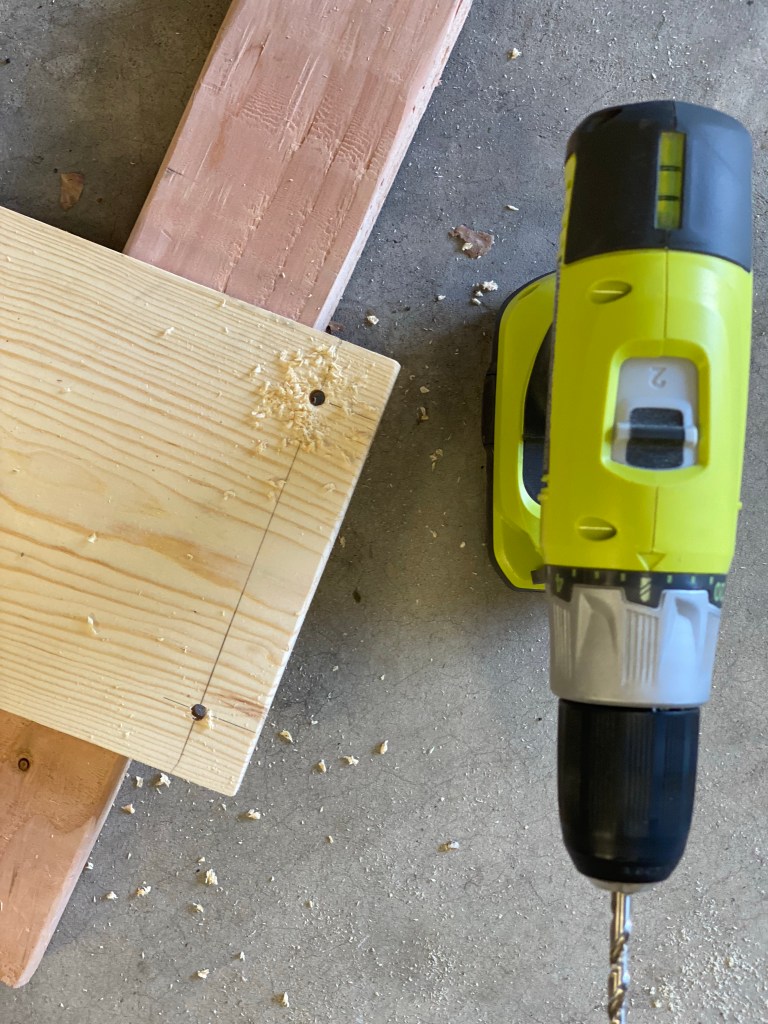
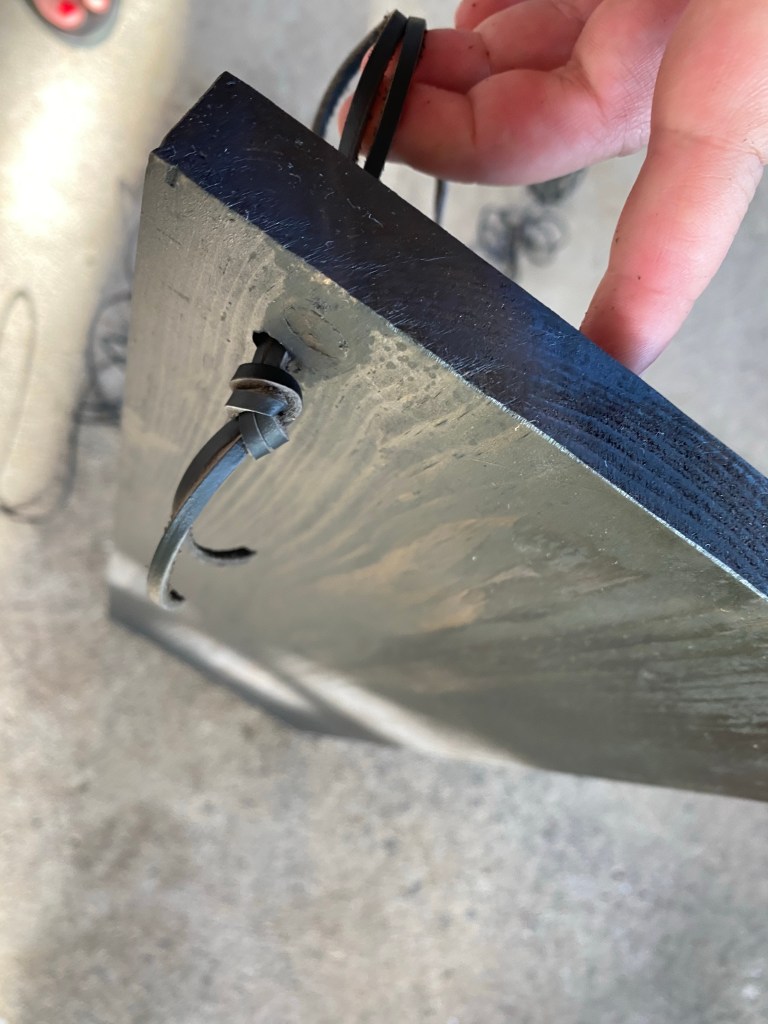
Next, I used my handy “perfect square” tool to mark out 1” from the edges of the board for drilling later. This can be done easily with a tape measure or ruler.
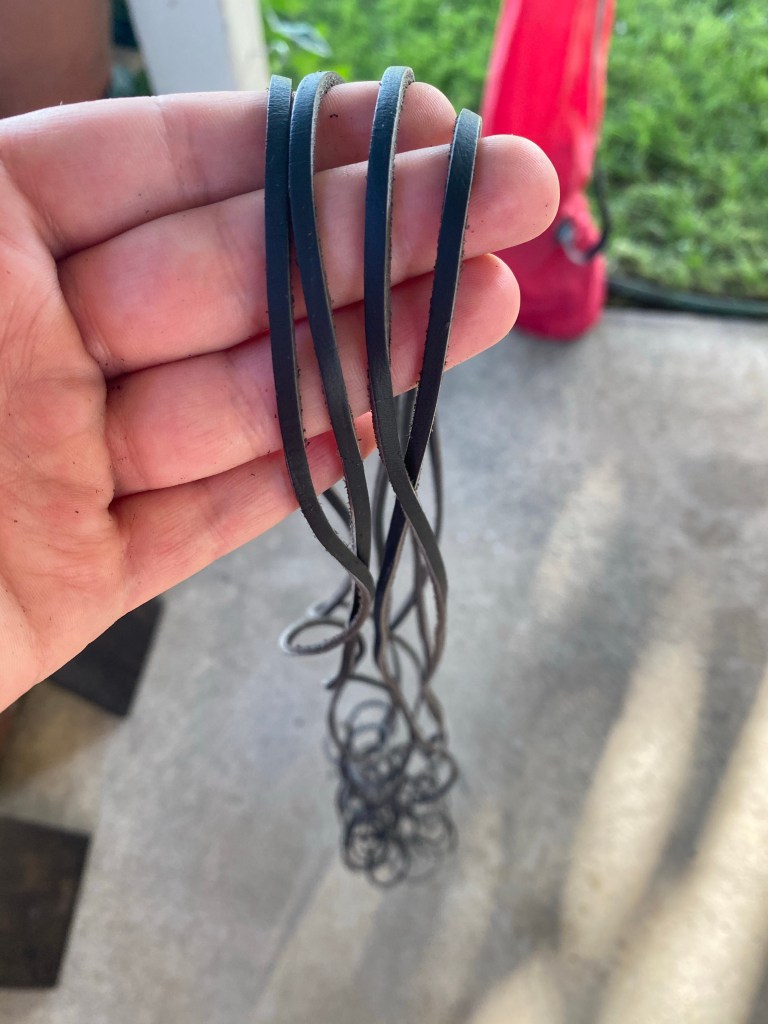
I used ¼” drill bit for the holes- but adjust as needed if you want to use a different string! I used leather!
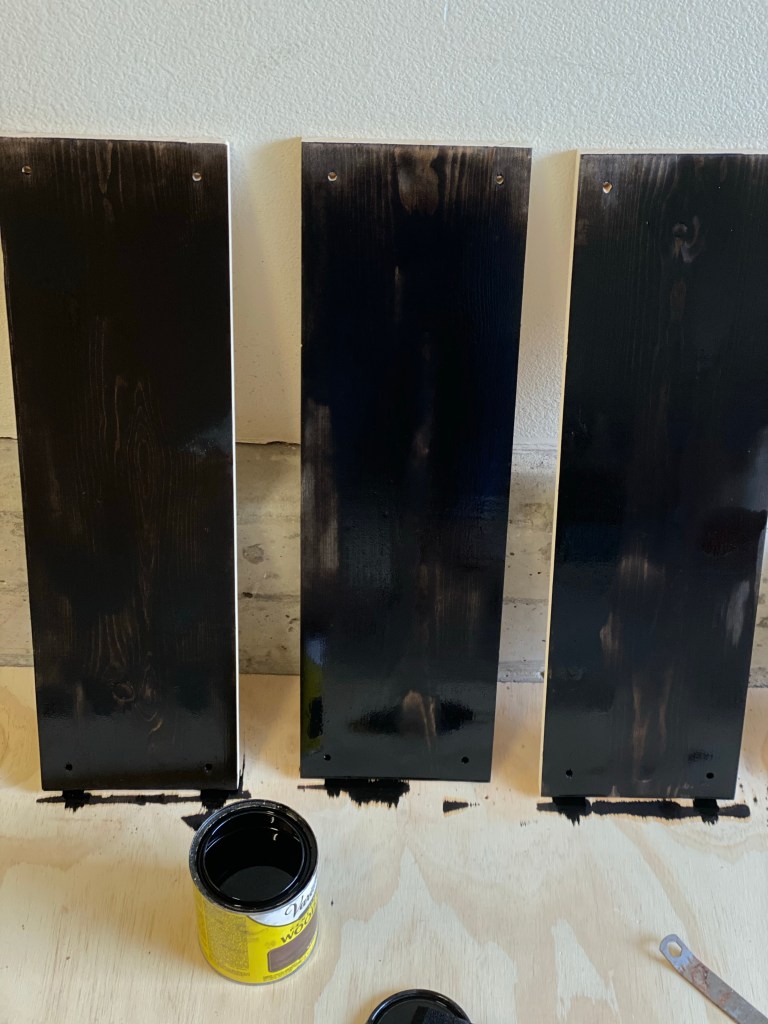
The most time consuming part was sanding, staining and sealing! For this project I used my Ryobi Orbital sander with sandpaper grits 150 & 220! You can do this by hand as well, just try to get it as smooth as possible. I already had some Varathane Classic Stain in Expresso- be sure to follow the directions on the stain you choose as all have different dry/cure times! After the stain was dry I applied a coat of Varathane Polyurethane Satin Clear to protect the wood. Definitely the most time consuming because of drying times.
After that all I had left to do was string the boards together and attach the hardware! I used two pieces of leather for added reinforcement and feed them through the hole in the board. Tying a knot behind each board!
Each board ended up being spaced about 10” apart! I recommend leaving the knots lose until you are sure the boards sit level! Each leather piece was 8’ long so make sure you have quite a bit!
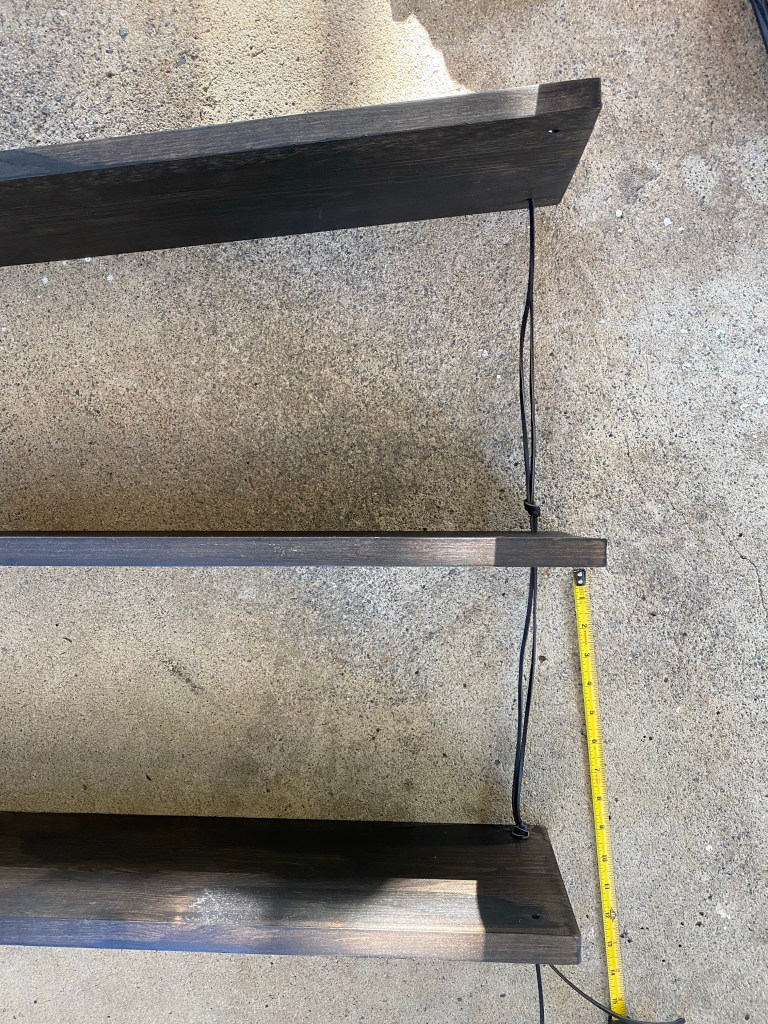
I forgot to take pictures but you’ll need to add the 1” metal rings to the string before you string and tie the second half of the boards!
Once everything is strung together you can hang it on the wall with the drywall anchors and ceiling hooks! Make sure the boards are level and adjust or tighten the knots as needed.
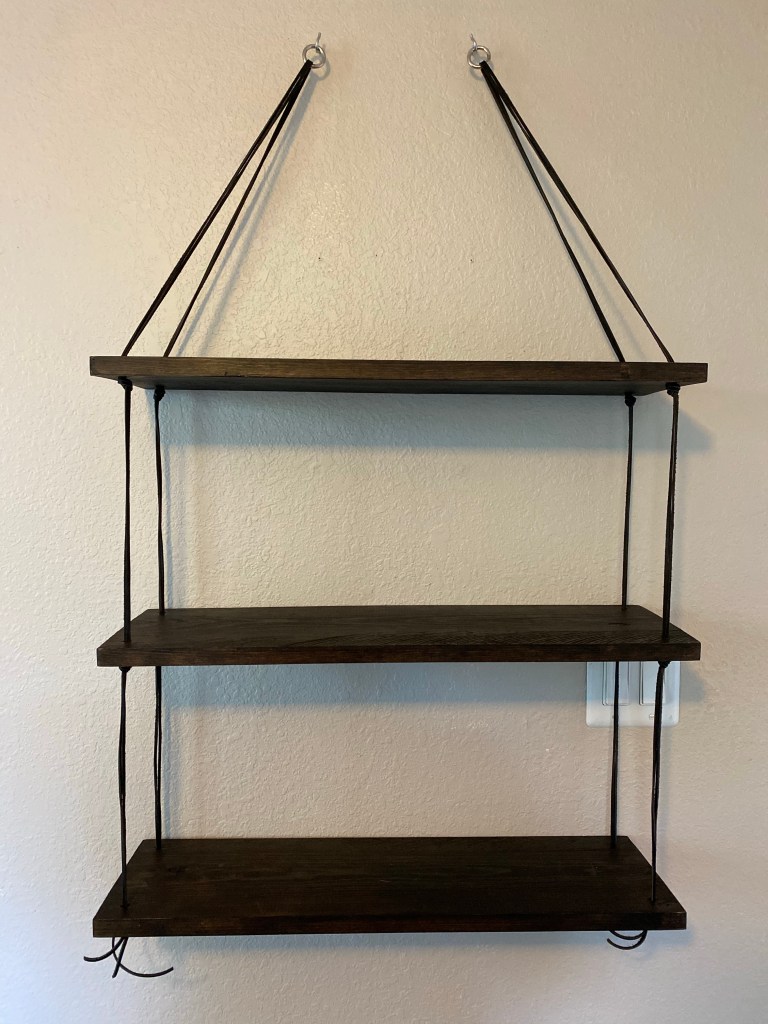
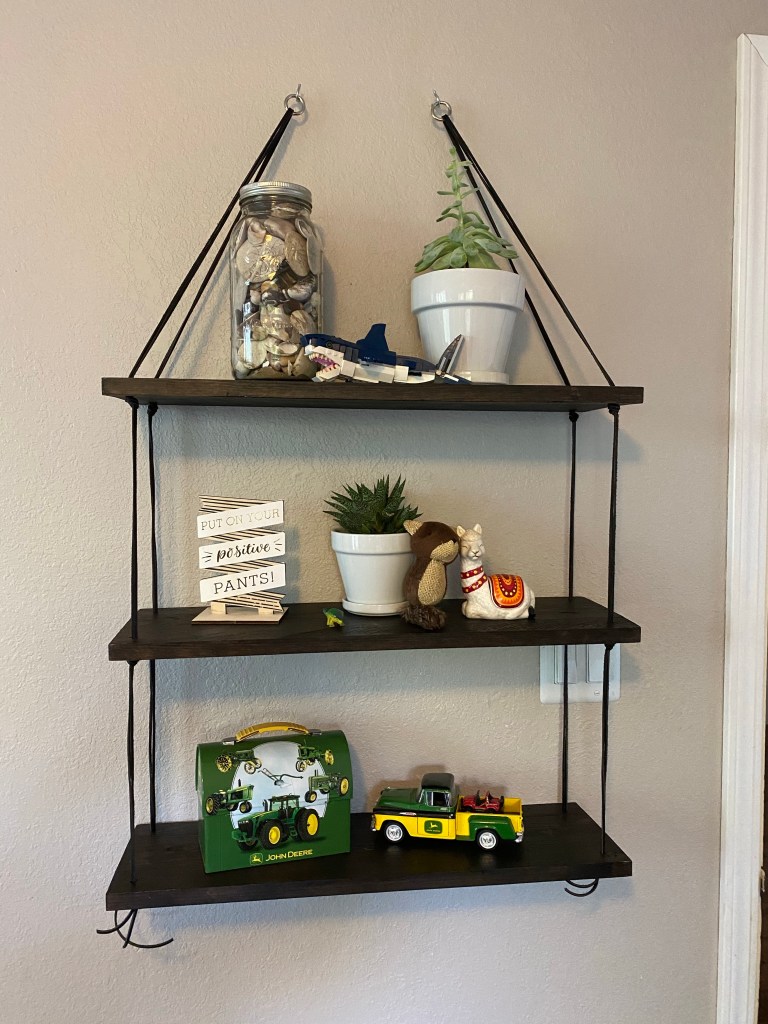
The shelves turned out perfect for what my sister needed and are a very cute display for her nicknacks!
Tag my Facebook, Instagram, or Twitter and use the hashtag #makingitmad if you make your own hanging shelves!
